What's New in Serial Studio 4.2.2
Serial Studio 4.2.2 adds device declarations, panel-hardware controls, write limits, acknowledged commands, three themes and an API that can see the window.

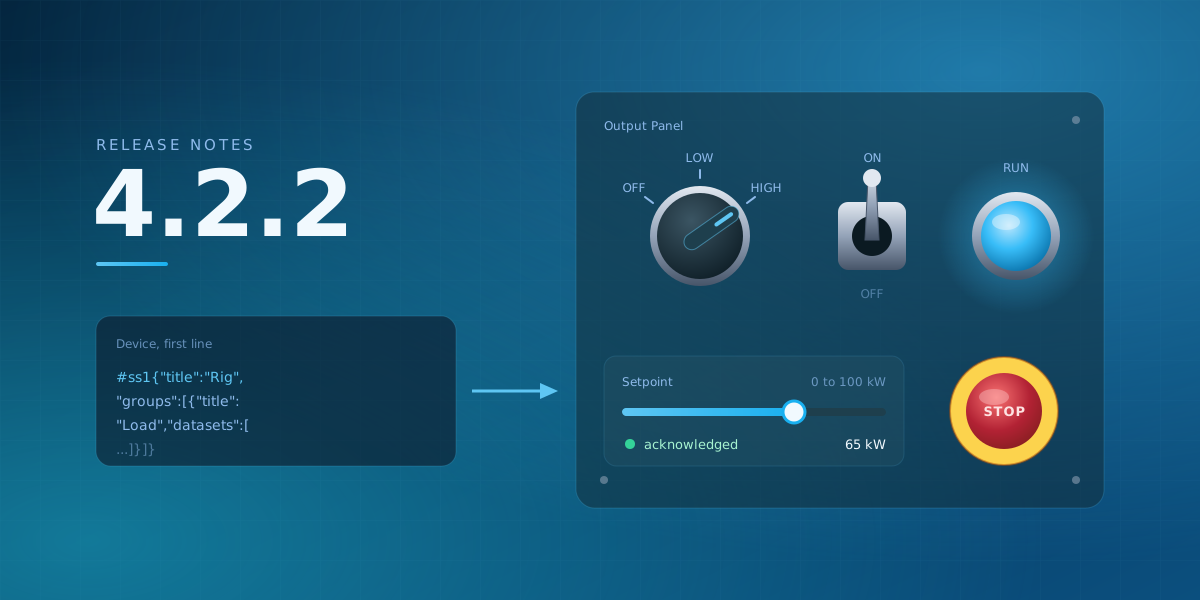
Serial Studio 4.2.2 is a point release by number and a large one by content. A device can now describe its own dashboard. Output controls look and behave like the hardware they stand in for, and they refuse values outside their range. Three new themes ship with it. And the API can now look at the window, which is how every screenshot in this post was taken.
This is a tour of what changed, with the mechanics behind each feature and links to the manual pages that cover them in full.
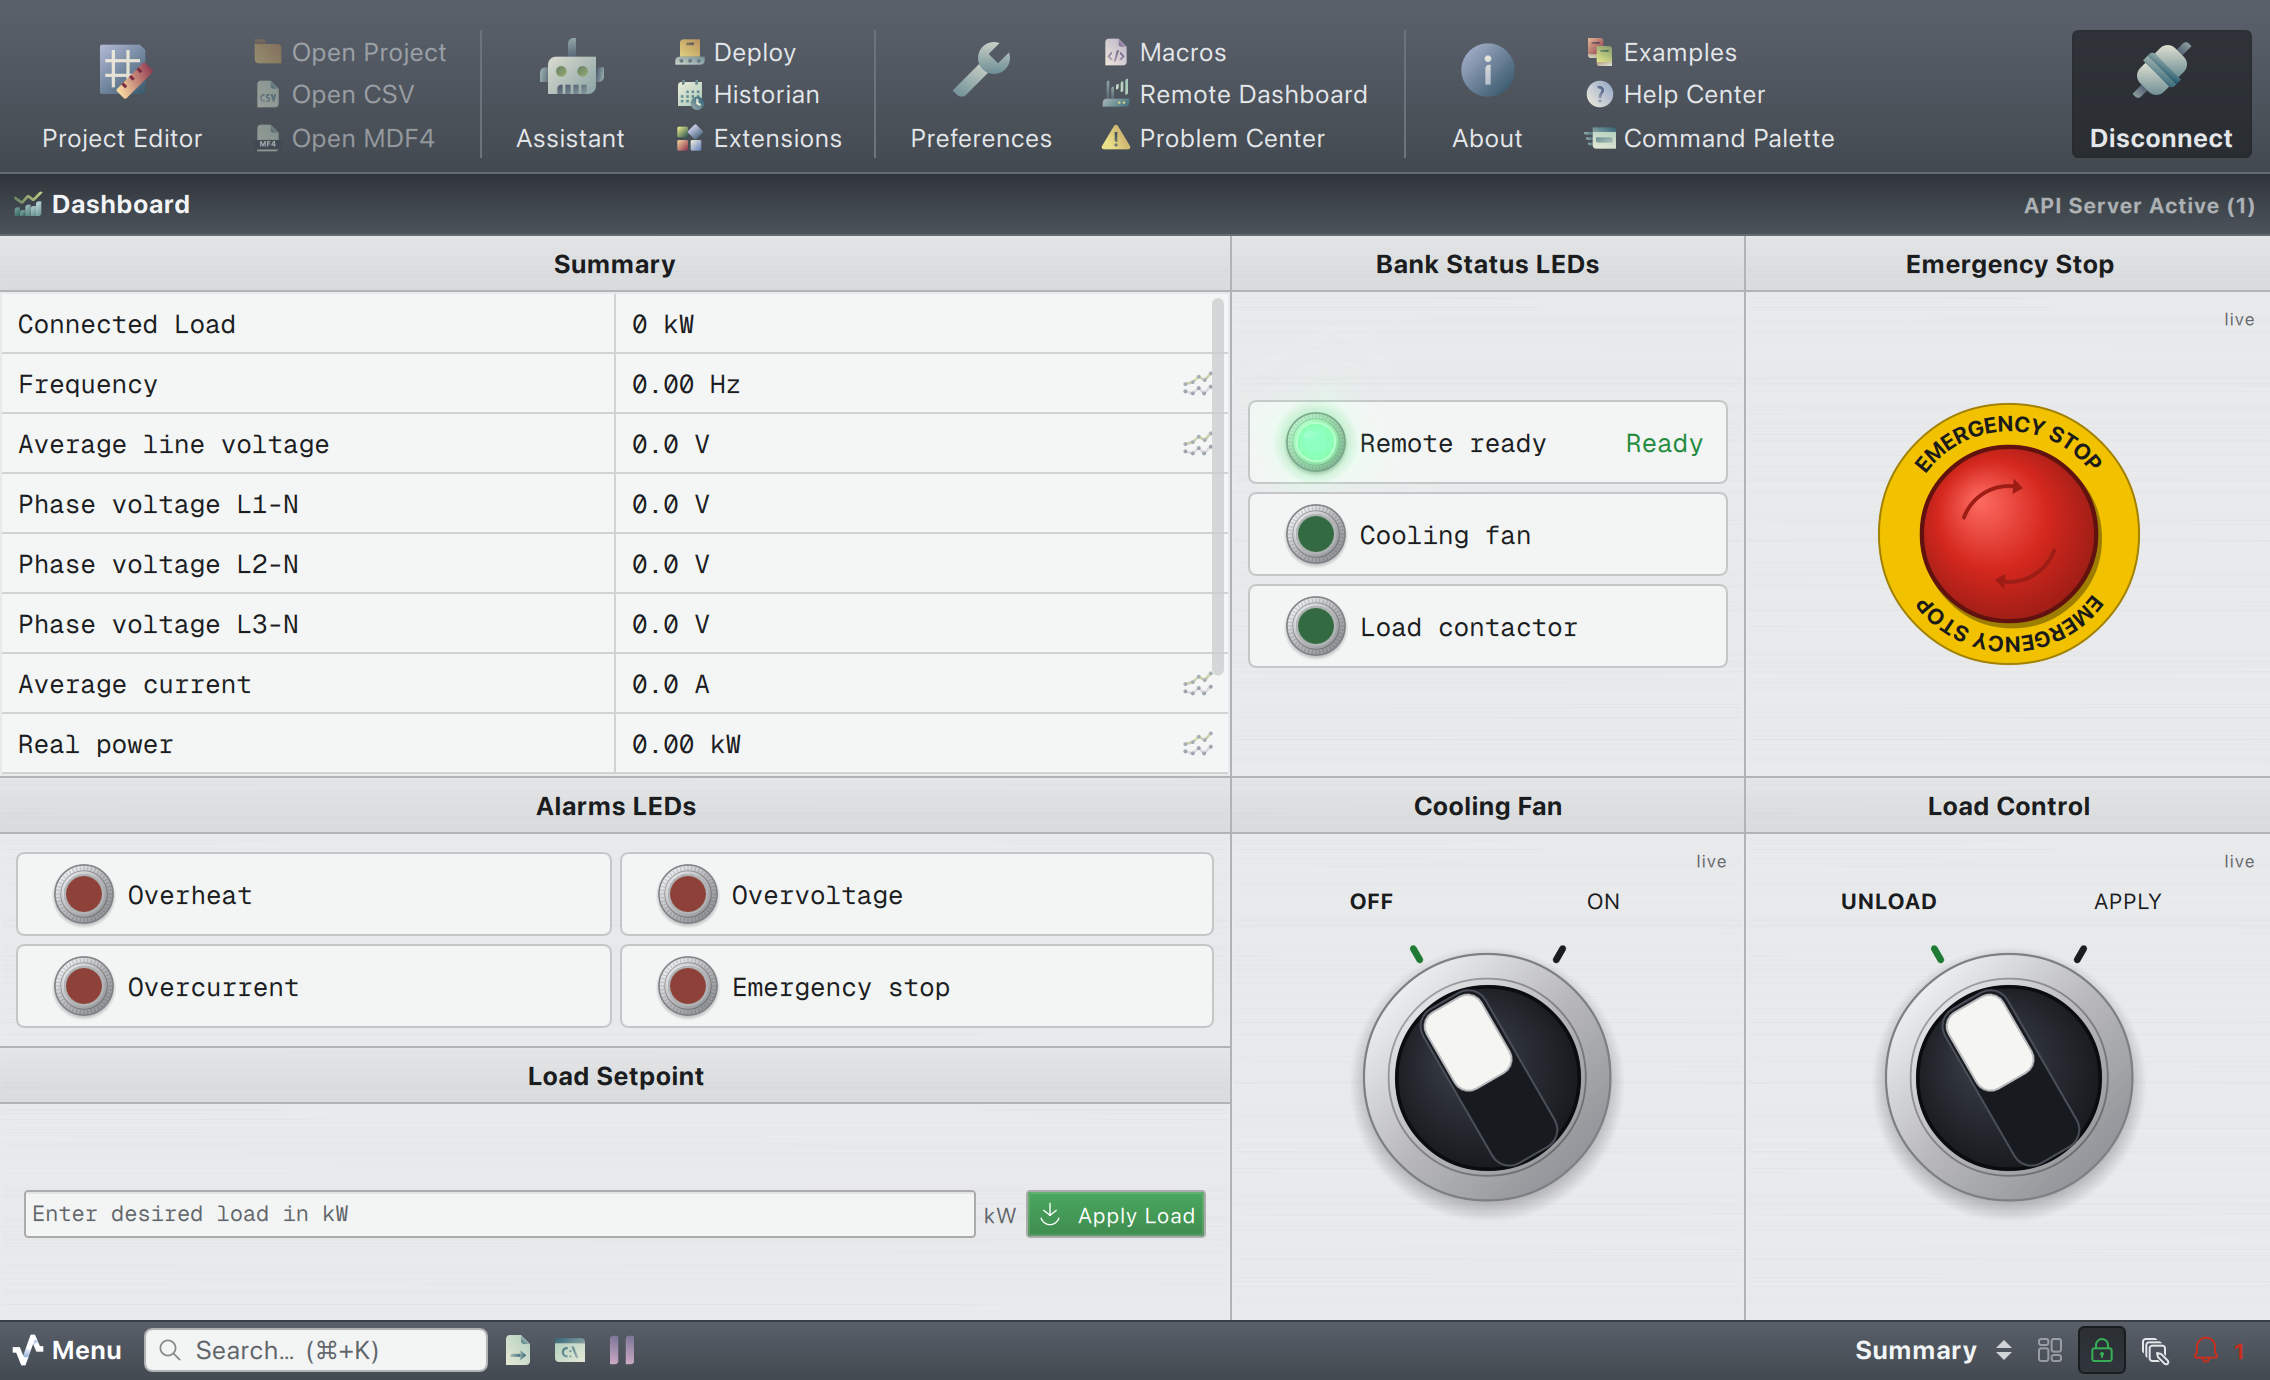
Three new themes: Millennium, Millennium Dark and Starliner
The screenshot above is Millennium, one of three themes added in this release next to Millennium Dark and Starliner. They bring material toolbars and taskbars, and a brushed surface behind the dashboard tiles.
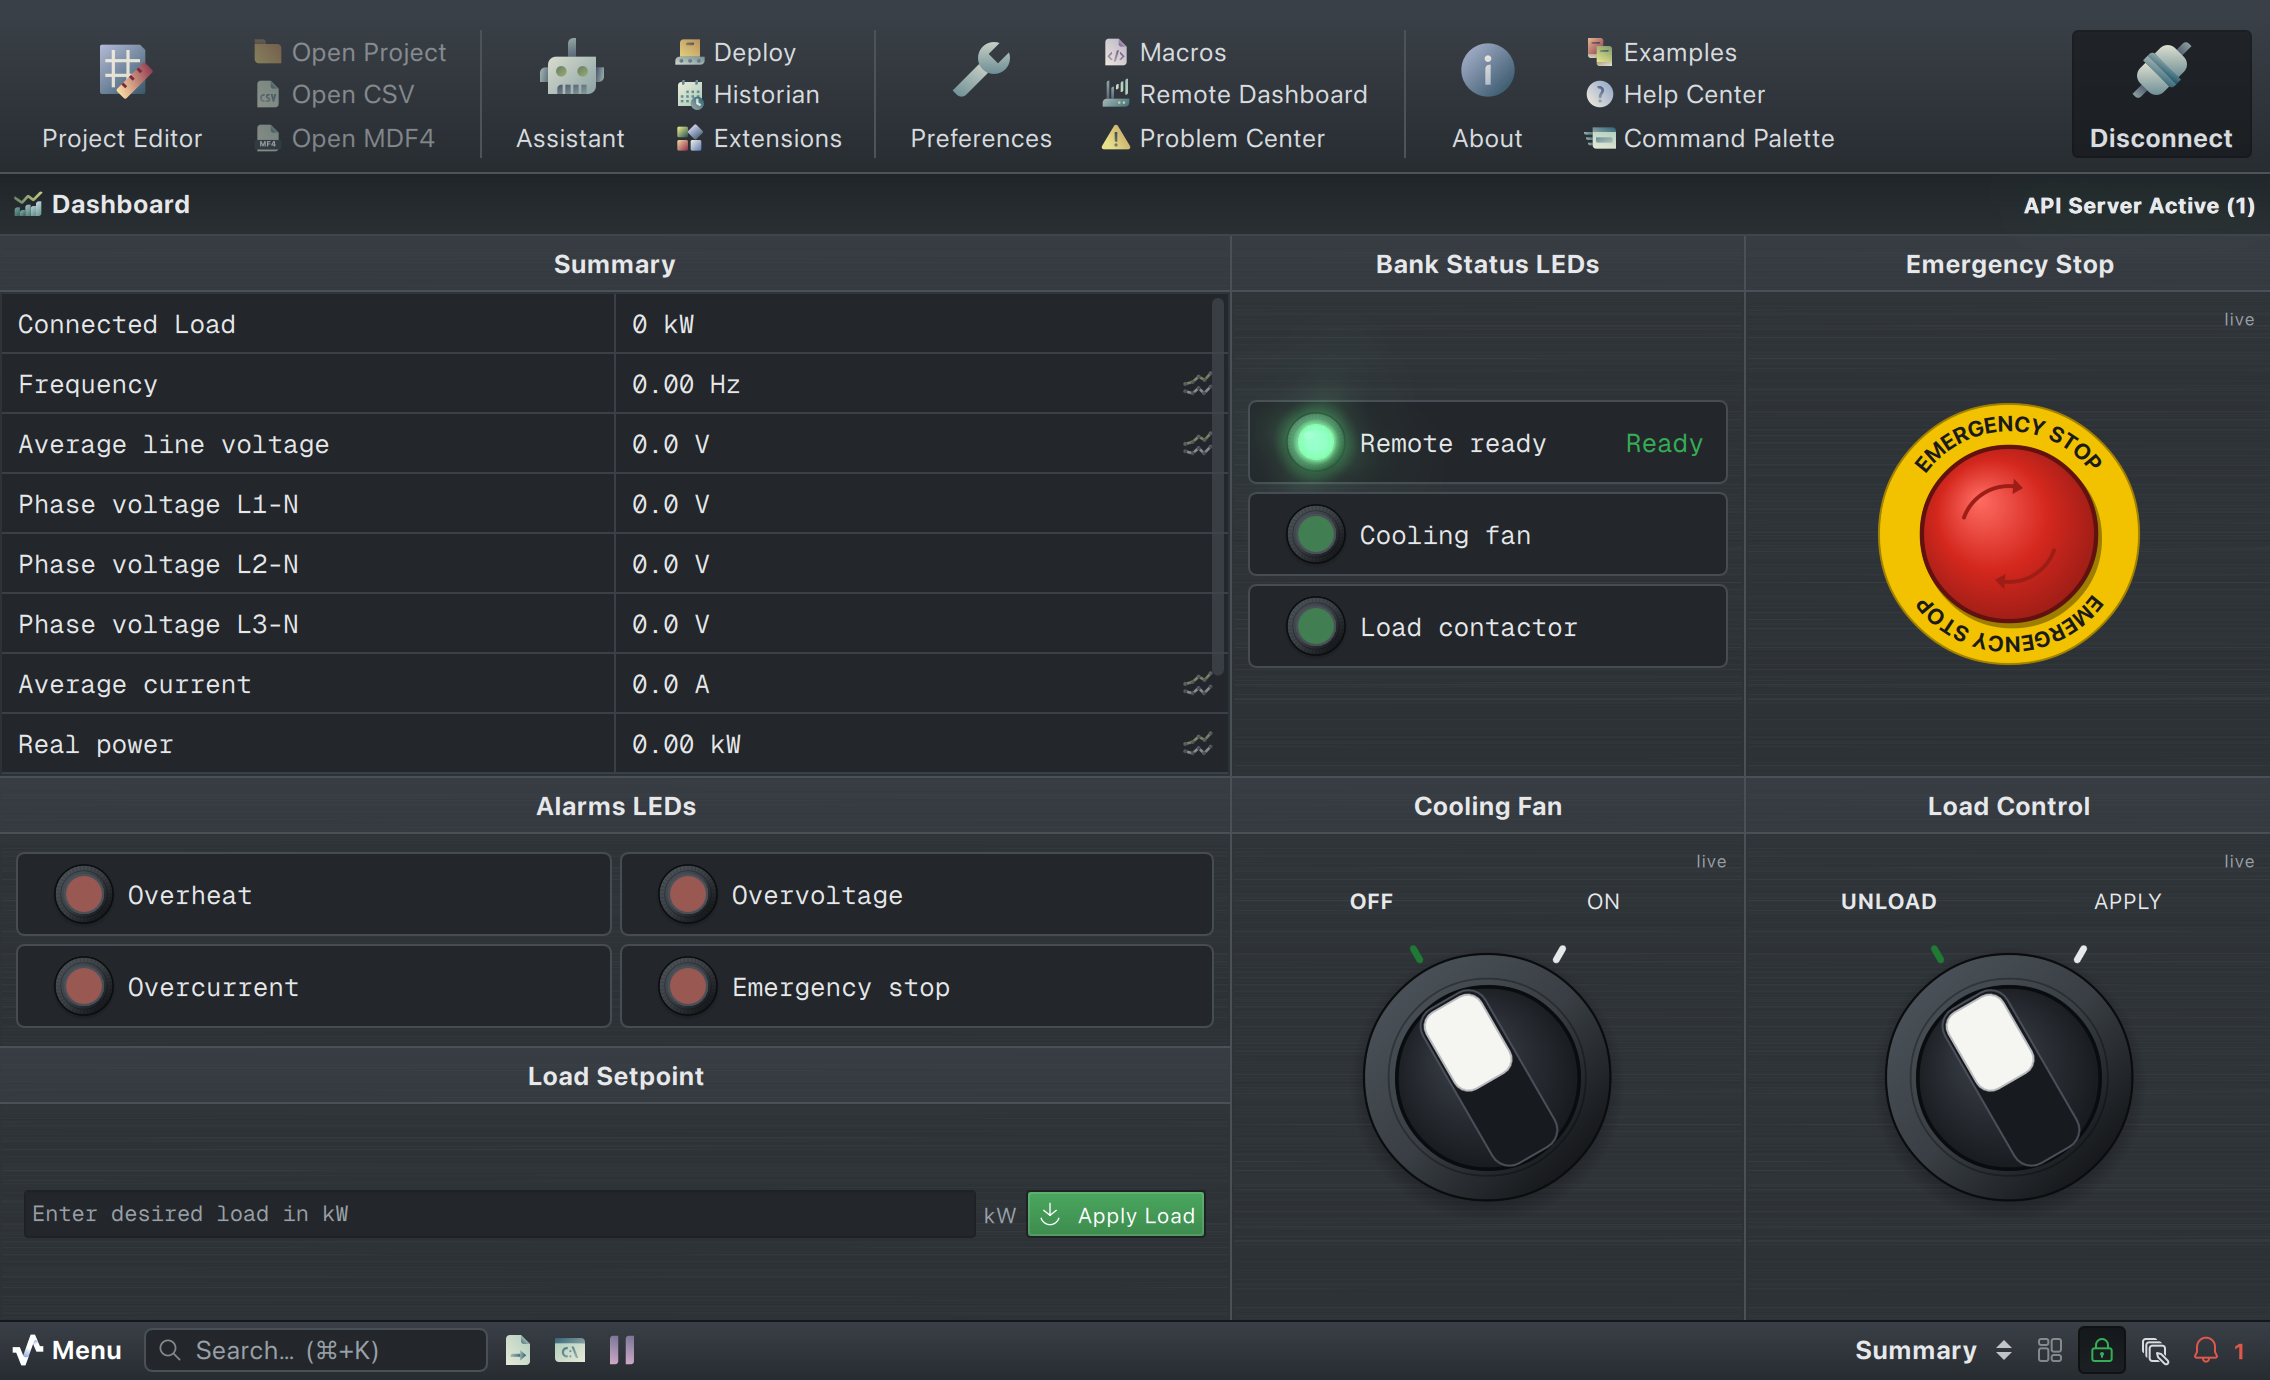
The theme selector lives in Preferences → General, and a Get Themes button beside it opens the Extension Manager already filtered to themes.
Icon packs
Until now the application's icons were one fixed set. In 4.2.2 they are served from selectable icon packs, and a theme can name the pack that suits it. Here is the same stretch of toolbar under the Default theme, Millennium and Starliner, each with the pack its theme asks for:
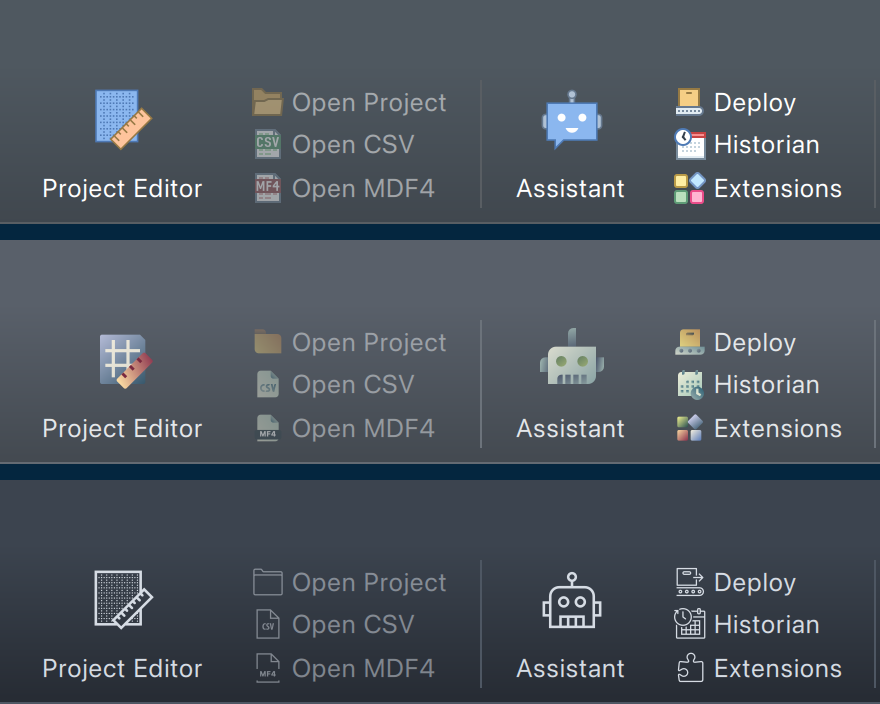
The official builds carry seven packs. Five are drawn in color and two, Outline and Fine Line, are single-color sets painted in the theme's text color. These are the same eight icons in each:
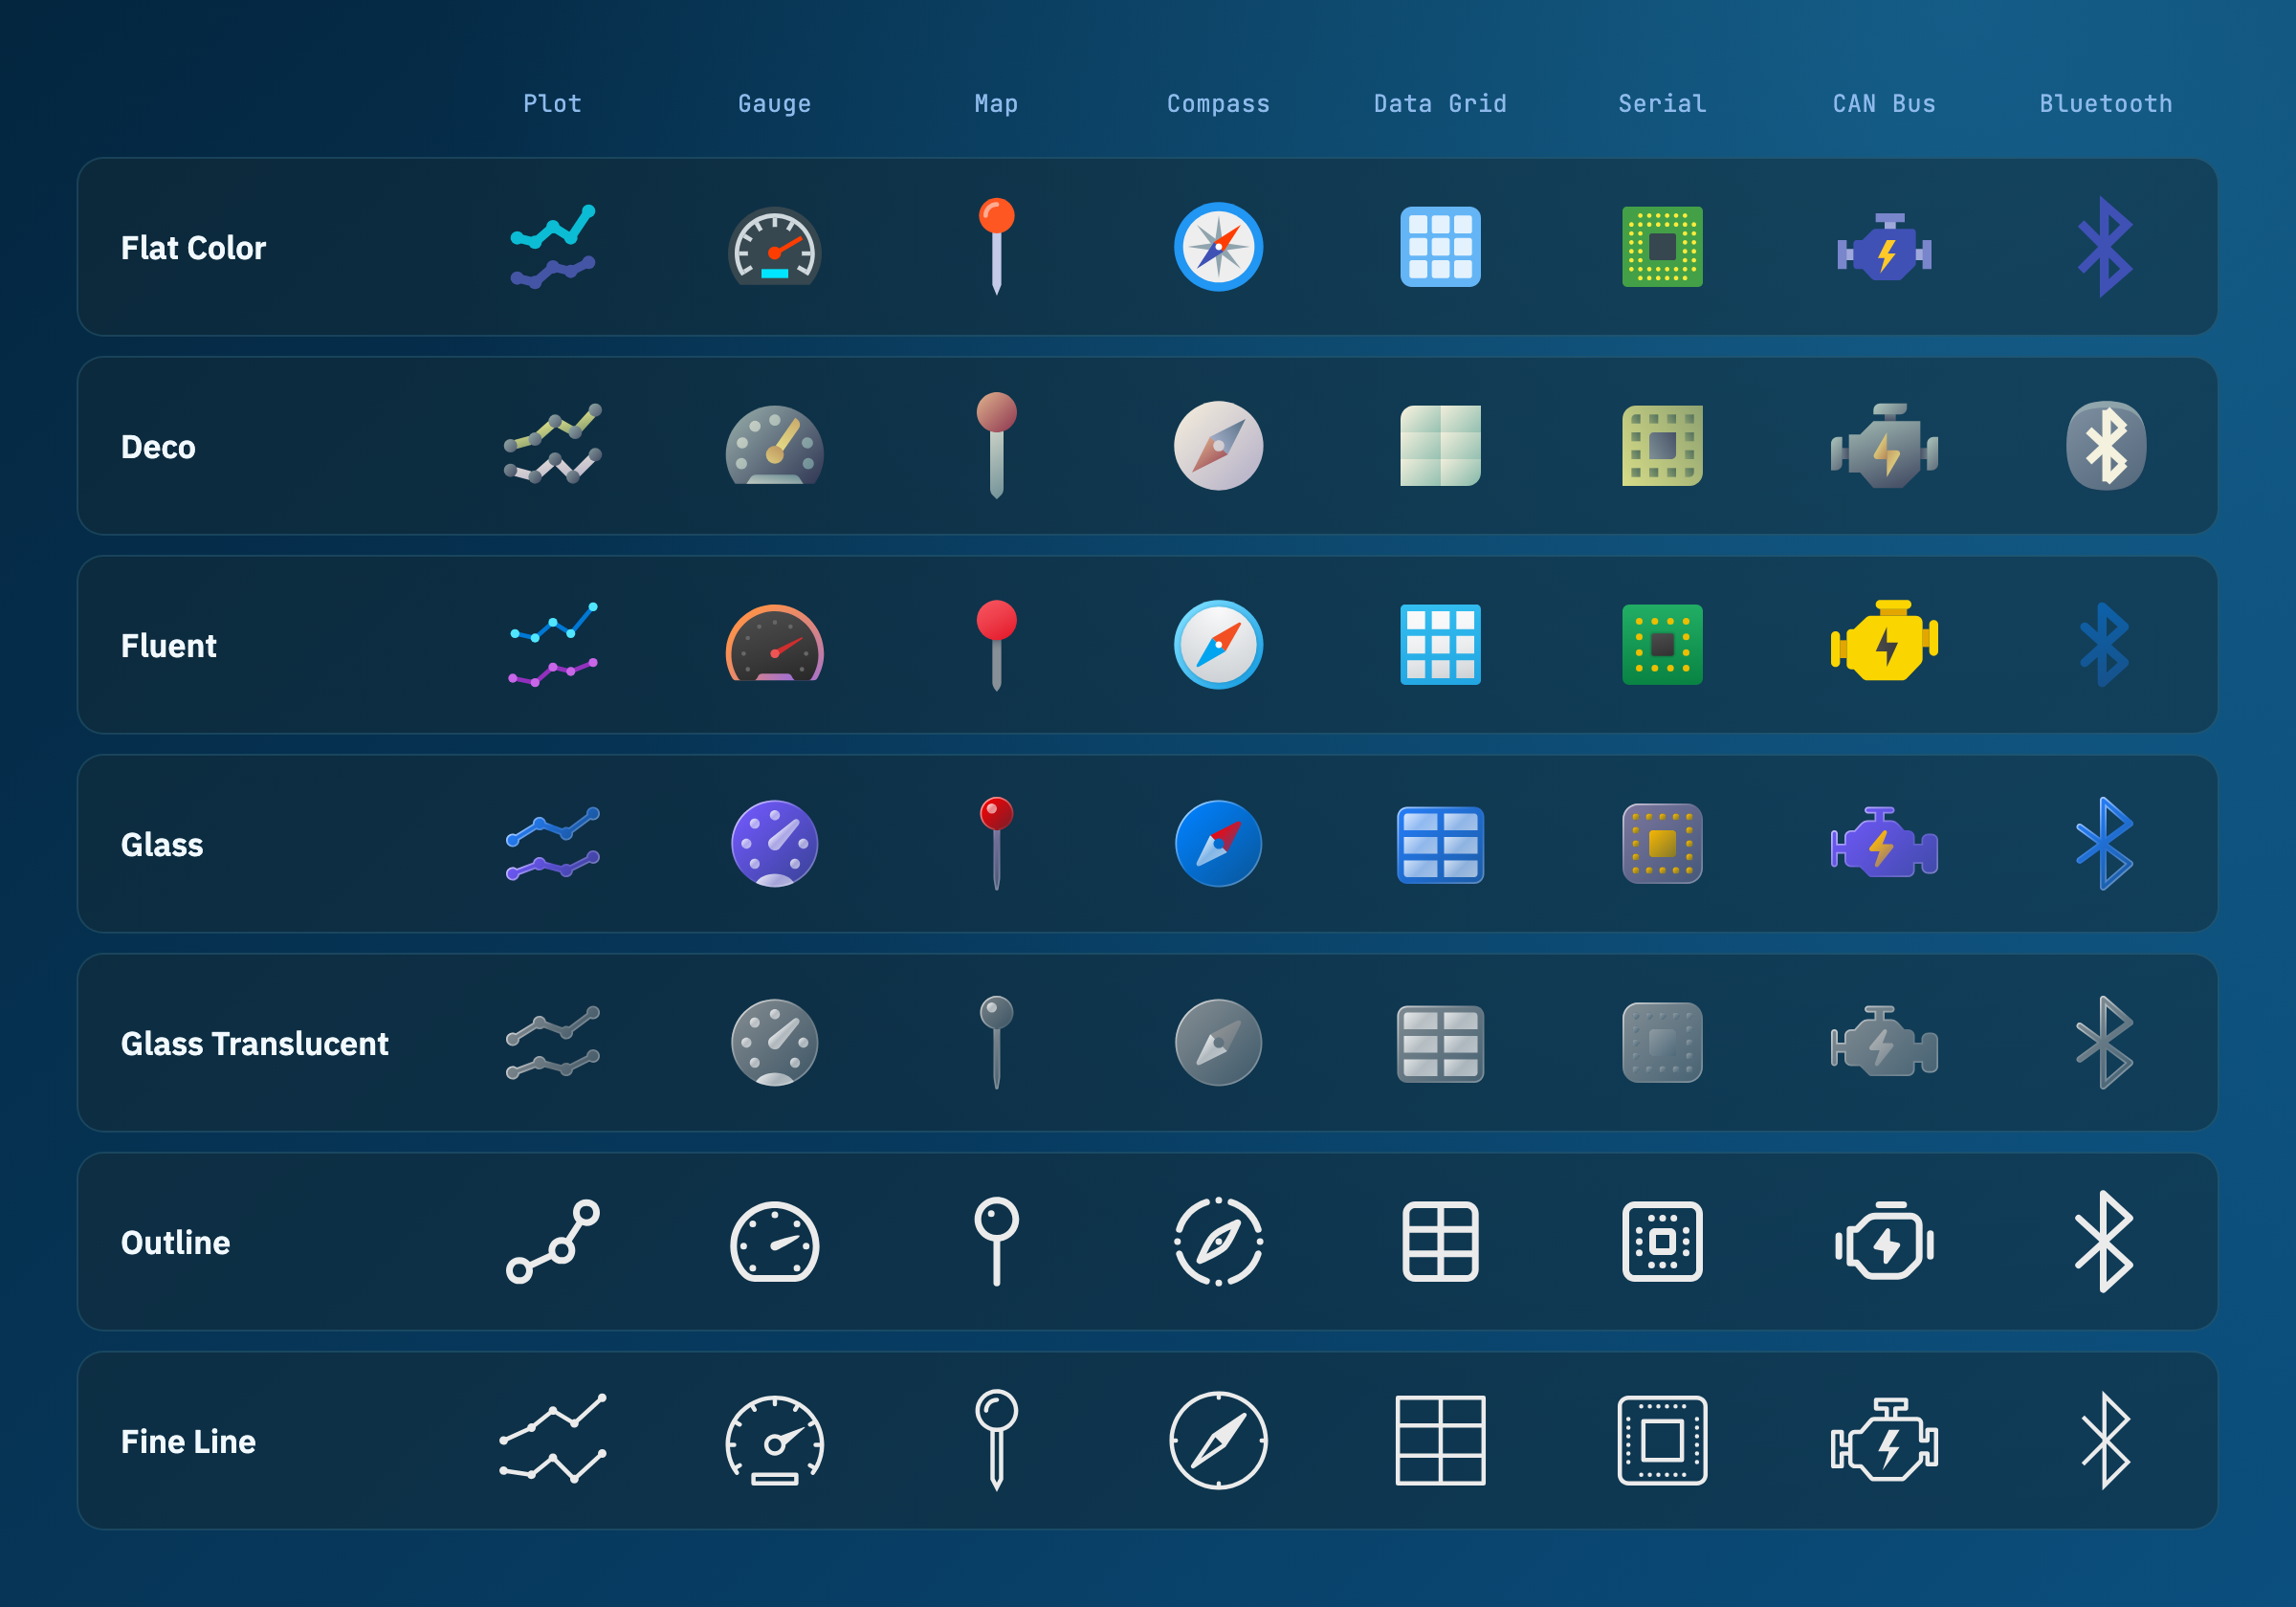
Two settings in Preferences → General control this:
- Icon Pack covers the color icons of the toolbar, the Project Editor, the dashboard and the dialogs. Follow theme, the default, uses the pack the theme names.
- Widget Toolbar Icons covers the small buttons on dashboard widgets and is chosen separately.
Pick a pack by name to pin it under every theme. Basic, a colorful set drawn for Serial Studio, is included. The Preferences page lists every option.
Controls that look like the panel they replace
Output controls are the widgets that send something to the device: buttons, sliders, toggles, text fields and knobs. In 4.2.2 they gain panel-hardware styles, so a dashboard that stands in for a control panel can look like one.
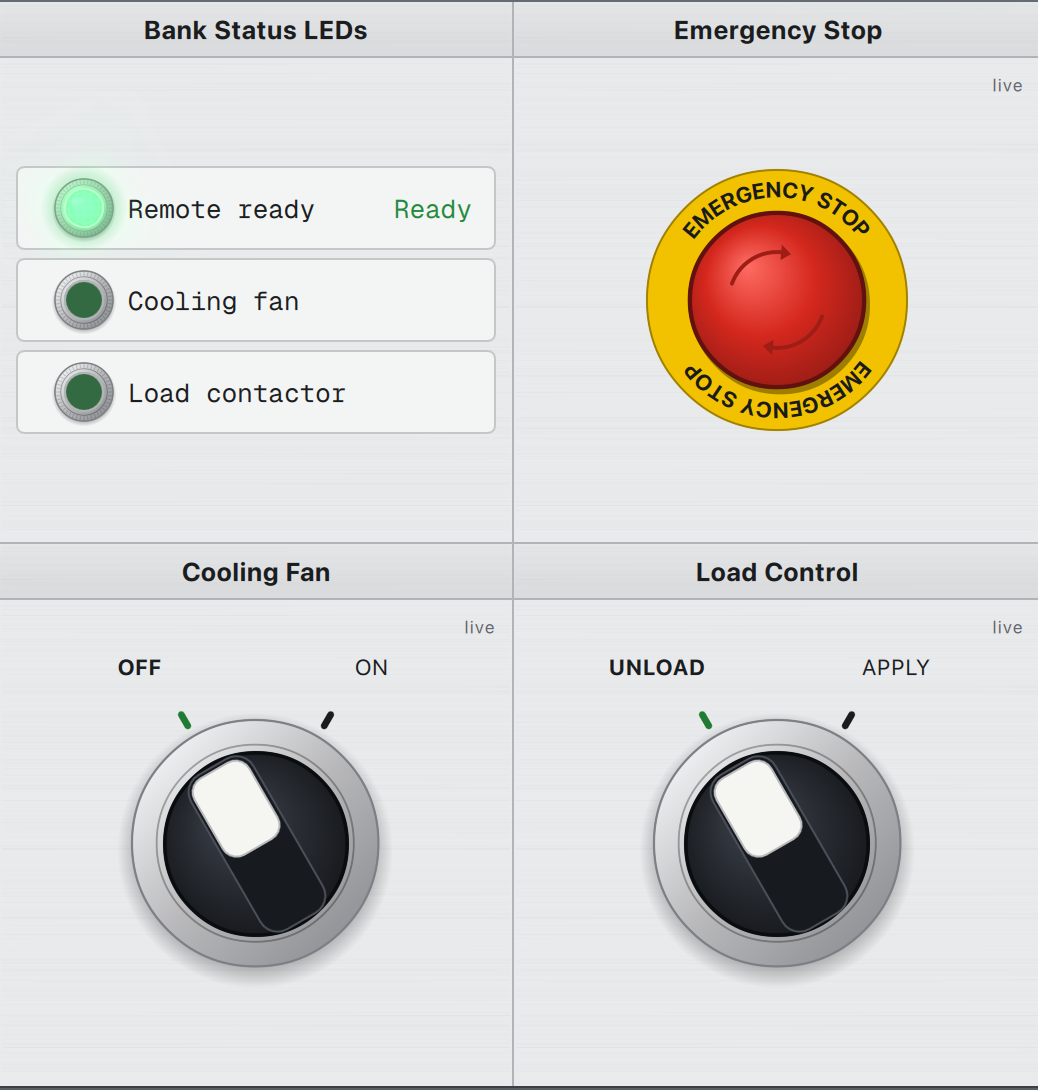
The crop above comes from the load bank section of a test-cell project that talks to its load bank over Modbus. Nothing in it is a picture: each control is an ordinary output widget with a style set in the Project Editor.
- Illuminated Push Button is a round colored head in a metal ring, lit while a latching button is on. On an HDR display the lit head glows.
- Emergency Stop is a red mushroom head on a yellow ring. One press latches it and sends
1. A second, separate press releases it and sends0. The press goes out at once, without the short pacing delay other control changes get. - Rotary Selector draws a knob as a selector switch with one labelled position per step. The two selectors in the crop are two-position ones. With Spring Return on, a selector holds a position only while pressed, like a jog switch, and returns to its rest position when released.
- Lever switches and pointer knobs round out the set.
A style is stored in the project and works under every theme.
One caution belongs next to the screenshot, and the manual states it plainly: an on-screen emergency stop is a command sent over the data link. It reaches the equipment only if the computer, Serial Studio, the connection and the device firmware are all working. It is never a substitute for a hardwired emergency-stop circuit.
Notice the small live tag in the corner of each control. Those controls are bound to a state source, so they show what the equipment reports instead of what was last clicked. The Output Controls page covers state feedback and every style. Output controls are a Pro feature.
Write limits
A slider, a knob or a Number text field now checks its value against Min, Max and an optional Step before anything is sent. The transmit function never receives a value outside the range, whether it came from the pointer, the keyboard or an API client driving the dashboard. A slider or knob cannot be moved past either end. A Number field refuses the value and shows the allowed range beside the control.
The limits are part of the project, so a remote client can read them before it drives a control. Asking the API about the setpoint field in the screenshot returns, among other things:
{
  "title": "Load Setpoint",
  "inputKind": 1,
  "minValue": 0,
  "maxValue": 120,
  "stepSize": 1
}
The same Step also drives the keyboard: with a control focused, the arrow keys and the mouse wheel move it by one Step, or by ten with Shift held. The wheel acts only on the focused control, so scrolling a panel never moves a setpoint.
The limits guard against a typing mistake. They do not check what the device accepts, which is the job of the next feature.
Acknowledged commands
State feedback answers "what is the equipment doing". An acknowledged command answers a narrower question: did the device accept the command I just sent?
The control sends a number with each command. The transmit function receives it as a second argument:
function transmit(value, token) {
  return "SP " + value + " " + token + "\n";
}
The device echoes that token in its next frames, followed by a result code and an optional message:
42,18,0,OK
42,19,2,above limit
A code of 0 acknowledges the command and any other number refuses it. The control then shows one of three outcomes: acknowledged, refused with the device's message, or unanswered when the wait runs out with no reply carrying the token. A script that ignores token works as before.
The new Acknowledged Commands example pairs an Arduino sketch with a Blink button and a Setpoint field. The sketch refuses a setpoint above 80 although the control accepts up to 100, which shows the two layers working together: the control stops typing mistakes, and the device has the last word.
A device can describe its own dashboard
Quick Plot has always been the zero-setup mode: print comma-separated numbers and get plots. What it could not know was what the numbers mean. Device declarations close that gap. The firmware sends one line that says how to draw its values (titles, units, ranges and widgets) and Serial Studio builds the dashboard from it on connect, with no project file.
With the Serial Studio device library, an Arduino sketch that declares a GPS map looks like this:
#include <SerialStudio.h>

SerialStudio studio(Serial, "TinyGPS");

void setup() { Serial.begin(115200); }

void loop() {
  studio.poll();

  studio.group(F("GPS Map"), F("gps"));
  studio.channel(F("Latitude"), 48.8584, 4).units(F("deg")).widget(F("lat")).graph(false);
  studio.channel(F("Longitude"), 2.2945, 4).units(F("deg")).widget(F("lon")).graph(false);
  studio.channel(F("Altitude"), 35.0, 1).units(F("m")).widget(F("alt")).graph(false);
  studio.send();
}
The first pass through loop() sends the declaration. Every later pass sends a frame with the current values. The same channel() call that sends a value also declares it, so the description sits in the line where the sketch already prints the number.
On the wire, a declaration is a single line of text: the reserved prefix #ss, a version digit, and a JSON object.
#ss1{"title":"TinyGPS","groups":[{"title":"GPS Map","widget":"gps","datasets":[...]}]}
A few properties make this safe to leave in production firmware:
- A declaration is data. It never carries a script, a transform, a file path or a connection setting, and it never changes the operation mode or writes a file.
- Old behavior is untouched. A device that declares nothing is a plain Quick Plot stream, exactly as before.
- Asking is opt-in. A device normally declares at power-up. Ask Devices for Their Dashboard in Preferences → Plotting makes Serial Studio send one
#ss?request line as a Quick Plot connection opens, which finds a device that booted before the app was listening. It is off by default. - You can keep the result. Save as Project turns the declared session into a project file you can edit.
The library ships in the firmware/ directory of the repository in three variants with one wire format: an Arduino header, a C99 file and a Python module. It is MIT licensed, so it can be embedded in closed firmware. Declarations are free. Declared controls generate an Output Panel, which needs Pro.
The Device Declarations page has the full wire format and the limits.
The library is not Arduino-only. The same GPS map from a Python script, over a serial port:
import time
import serial
import serialstudio

port = serial.Serial("COM3", 115200)
device = serialstudio.Device("TinyGPS", write=port.write)

while True:
    device.poll()
    device.group("GPS Map", "gps")
    device.channel("Latitude", 48.8584, places=4, units="deg", widget="lat", graph=False)
    device.channel("Longitude", 2.2945, places=4, units="deg", widget="lon", graph=False)
    device.channel("Altitude", 35.0, places=1, units="m", widget="alt", graph=False)
    device.send()
    time.sleep(0.1)
A device can declare controls too. This adds a slider to the dashboard and hands its value to a callback, which returns 0 to accept the command:
int onSpeed(const char* name, double value) { analogWrite(9, (int)value); return 0; }

studio.onControl(onSpeed);
studio.controlGroup(F("Controls"));
studio.control(F("Speed"), SS_CONTROL_SLIDER);
Moving the slider makes Serial Studio send a line such as #ss!Speed=128, and the library routes it to onSpeed.
Quick Plot reads more line formats
You do not need the library to benefit from this release. Quick Plot itself now understands far more of what firmware already prints. It detects the format from the first line where at least half the fields are numbers, then keeps that format for the connection.
Plain values still work as they always did. This is the whole sketch:
void setup() { Serial.begin(9600); }

void loop() {
  float temp = 23.5;
  float hum = 60;
  Serial.print(temp);
  Serial.print(",");
  Serial.println(hum);
  delay(1000);
}
Each line is one sample and each number becomes one plot. Commas, semicolons, tabs and runs of spaces all separate values, so these three streams give the same three channels:
23.5,60,1013
23.5;60;1013
23.5 60 1013
A header row names the channels. Print it once in setup() and the text line titles the plots:
Temperature,Humidity
23.5,60
23.6,59
Named values need no header. If your firmware already prints debug lines like these, they plot as they are, with either : or =:
temp: 23.5, hum: 60
temp=23.6,hum=59
Units come along. A unit written after a number becomes the channel's unit and is stripped from the value:
23.5degC, 1013hPa, 45%
One-line JSON is read directly. Nested objects flatten to dotted names and arrays to indexed names, so this line produces channels called t, imu.ax, imu.ay, acc[0] and acc[1]:
{"t":23.5,"imu":{"ax":0.02,"ay":-0.98},"acc":[1.2,3.4]}
Decimal commas work when the separator is a semicolon or a space, which matters for firmware written with a European locale in mind. 23,5;60 reads as 23.5 and 60.
Real serial output is rarely this clean, and the edge cases are where the release earns its keep:
- Text lines are left alone. A line with no number in it, such as
WiFi connected, still shows in the console but never touches the dashboard. In earlier releases any text line rebuilt it. - A missing name leaves a gap. In a named stream, a line without
humleaves that plot empty for that sample, and the Data Grid keeps the last value. A new name simply adds a channel. - Boot chatter does not become the header. An all-text line only titles the channels when it has the same number of fields as the first data line.
When the stream looks right, Save as Project on the dashboard turns the session into a project file that reproduces what you saw, ready for widgets, alarms and everything else Quick Plot does not do. One limit stays: Quick Plot reads text only, with no binary or hex input. The Operation Modes page has the complete table of accepted shapes.
Values that read as words
A status register that holds 3 means nothing until someone looks up the table. A dataset can now carry that table itself: a list of value labels for integer values, so 3 reads Charging on every widget, table and export that shows the value as text. Plots, alarms and the API's numeric fields keep the number.
Datasets can also declare a fixed-point, bit-field or linear-scale decoder, which covers the common cases that used to need a transform script. The DBC importer now writes label tables in place of the Lua lookup it used to generate, so an imported CAN project has less code in it.
Labels open from a dataset's right-click menu in the Project Editor, next to Alarm Bands and Frequency Markers.
Serial ports that need a wake-up routine
Most boards stream as soon as the port opens. Some devices do not: a bus adapter that resets on a BREAK, or a module that a configuration message switches to a faster baud rate. Bringing those up used to mean a script or the vendor's own program.
A UART source can now run a Connection Sequence on open. It is an ordered list of steps, and it is part of the free edition:
| Step | What it does |
|---|---|
| Send BREAK | Holds the line in BREAK for a set time, then releases it |
| Wait | Pauses |
| Set Control Line | Drives DTR or RTS high or low |
| Send Data | Writes text or hex bytes, with a line ending and checksum |
| Expect Reply | Waits until the received bytes match a pattern |
| Clear Received Data | Drops what the port has received so far |
| Set Baud Rate | Changes the running rate and leaves the saved rate alone |
| Set Flow Control | Changes the running flow-control mode |
The manual's worked example is an adapter that powers up at 9600 baud, resets on a BREAK of at least 10 ms, answers with a version byte, and switches to 115200 baud when it receives two 15 bytes:
- Send BREAK, 55 ms.
- Expect Reply
55 | 5D ??within 100 ms. - Send Data
15 15as hex. - Wait 20 ms.
- Set Baud Rate 115200.
- Set Flow Control RTS/CTS.
The whole sequence runs inside a time limit. While it runs the device is connecting, not connected: the dashboard receives no frames and writes are refused. The link reports connected only when the last step succeeds, and each step is written to the console. The UART driver page documents every step.
The driver also gains Hold RTS, a timed BREAK and a live baud change, all available to scripts and API clients as io.uart.* commands. And frames can now be delimited by a fixed byte count, for binary protocols with no start or end marker.
The API can see the window
Serial Studio has an API server: a TCP socket on port 7777, off by default, that takes one line of JSON per command and answers with one line of JSON. The same commands are reachable over gRPC and MCP. The running 4.2.2 build that produced this post registers 465 of them.
What is new is a family of ui.automation.* commands that work on the window itself: list the windows, list the controls in one, click, type, and capture a screenshot. The screenshots above were taken by a short Python script and no screen-capture tool. This is the whole client:
import base64
import json
import socket

sock = socket.create_connection(("127.0.0.1", 7777))
lines = sock.makefile("r", encoding="utf-8")


def call(command, **params):
    msg = {"type": "command", "id": command, "command": command}
    if params:
        msg["params"] = params
    sock.sendall((json.dumps(msg) + "\n").encode())
    for line in lines:
        reply = json.loads(line)
        if reply.get("type") == "response" and reply.get("id") == command:
            return reply


shot = call("ui.automation.screenshot")["result"]
with open("dashboard.png", "wb") as f:
    f.write(base64.b64decode(shot["png"]))
The loop that skips lines matters: when a device is streaming, frames arrive on the same socket as extra lines no command asked for, and the answer is the line whose id matches.
ui.automation.screenshot returns {png, width, height, scale}. Pass an element id to capture one control or one dashboard tile on its own, such as the emergency stop without the rest of the window. If a capture would exceed 4 MiB, the scale halves until it fits and the reply says which scale was applied, so check it when you need native resolution.
To find out what can be addressed, ask. ui.automation.listElements returns every interactive control with an identifier, a role, a label and its geometry:
settings.general.theme     combobox   Default
settings.general.iconPack  combobox   Follow theme
dashboard.tile.123         tile       Emergency Stop
dashboard.output.151.0.send  button   Apply Load
Switching themes for the screenshots was a click on the Preferences button, three presses of the Down key on settings.general.theme, and a click on Apply. One more command is worth knowing for this kind of work: ui.automation.setReduceMotion turns entrance animations off and returns the previous value, so a screenshot taken right after a click is deterministic and the script can put the setting back.
Practical uses are the obvious ones: screenshots for a manual that regenerate when the UI changes, a visual check in a CI job, or an AI assistant that can look at the dashboard it was asked about.
Consent is part of the design
A program that can click anything can connect, save and delete. So the first ui.automation.click from that script did not click. It returned this:
{
  "code": "CONSENT_REQUIRED",
  "message": "Interface actions need the user's consent; a prompt was shown, retry after it is answered"
}
At the same moment a prompt appeared in the application asking the person at the screen whether API clients may drive the user interface. After a yes, the script retried and carried on.
There are four such prompts, and each covers one kind of risk:
| Prompt | Guards |
|---|---|
| Device control | Writing to a device from a remote client |
| Script changes | Installing script code or loading a project, since a project runs its scripts |
| Interface driving | Clicking, typing and showing a message box |
| Program launch | Starting a program from a script or a Process I/O source |
The rules are strict on purpose. The three prompts raised by API clients last for the current session only, and the launch prompt is remembered per project file. A yes to one prompt never covers another. Read-only commands, including the screenshot and the element list, need no prompt at all. A headless run cannot show a prompt, so for CI you start the app with SERIAL_STUDIO_API_AUTO_CONSENT=1 to grant them ahead of time.
This release also tightens two edges: unauthenticated remote sockets are held out of every broadcast, and a consent question no longer stacks a second one on top of itself.
MCP
For AI clients, the MCP side was brought up to date. Tools now carry titles and safety hints, so a client can tell a read from a write before it calls one. The handshake negotiates the protocol revision, and the bridge waits for Serial Studio and reconnects instead of exiting when the app is not running yet.
The API Reference is the full catalog, the gRPC Server page covers the binary transport, and the MCP Client example is a working starting point.
Smaller changes worth knowing
Multiple devices. When one device of a project fails to open, the notification names it and the others keep running. io.getStatus lists every source with its own state. A Modbus TCP source re-dials next to live devices, and its alarm clears when the re-dial succeeds.
Alarms only while visible. A dataset can be set to raise its band alarms only while a widget showing it is on screen, which keeps a workspace you are not looking at from interrupting the one you are.
Script message boxes. ui.window.showMessageBox lets a control script or an API client show a message box and wait for the answer. The box says that it was sent by the project's scripts or an API client and not by Serial Studio, so nobody mistakes it for an application error.
AI assistant. A paperclip button attaches files to the chat. PDFs and images go to the provider as files, and text files as their contents. The assistant can also answer questions about the application itself.
Project Editor. Alarm Bands, Value Labels and Frequency Markers open from the right-click menu and the command palette. An output group lists its controls as navigable rows.
Plain language. Dialogs, tooltips, dataset field descriptions and messages were rewritten, and the manual was reworked page by page, with new pages for Device Declarations and Preferences.
Before you upgrade
A few behaviors changed, and they are easier to meet here than by surprise.
- LED Panel is now a group widget. Projects that used the per-dataset LED flag are migrated on load to a derived LED Panel group. Check the result the first time you open an older project.
- Command-line options no longer change your settings. An option passed on the command line holds for that run only and is never written to the settings file. Starting a second instance no longer turns the saved API Server setting off.
- Sounds are off by default. Aural alerts and UI sounds start disabled. Turn them on in Preferences → Sounds.
- API clients need consent, as described above. Scripts that used to write to a device unattended need a person to answer once per session, or the environment variable for headless runs.
- Windows Smart App Control may prevent Serial Studio from running on newer machines because the binaries are not code-signed yet. Install from the Microsoft Store, or turn Smart App Control off in Windows Security.
- macOS 14 (Sonoma) is the minimum supported version.
Getting it
Serial Studio 4.2.2 is on the download page for Windows, macOS and Linux. The Linux builds bundle their glibc dependencies, so they also run on older distributions.
If you only try one thing, make it a device declaration: add the library to a sketch you already have, switch to Quick Plot, and connect. The dashboard that appears is the one the firmware asked for.


Comments